Create an ERC20 token
This tutorial shows you how to deploy and interact with an ERC20 token on ZKsync Sepolia Testnet.
This is what you're going to do:
Build an ERC20 token smart contract with additional custom logic
Deploy the smart contract to the ZKsync Sepolia Testnet using Remix.
Prerequisites
- Before you start, make sure that you’ve configured the ZKsync Sepolia Testnet in your wallet.
- Have at least 0.05 ZKsync Sepolia Testnet ETH. If you need more, use one of the faucets.
Custom ERC20 token code
ERC20 tokens are a standard for fungible tokens, which can be traded and represent a fixed value. You’ve used ERC20 tokens if you’ve transacted with USDC, DAI, USDT, LINK or UNI.
The ERC20 token we’re going to deploy will allow users to mint and burn tokens. The entire smart contract code is as follows:
// SPDX-License-Identifier: Unlicensed
pragma solidity ^0.8.19;

import "@openzeppelin/contracts/token/ERC20/ERC20.sol";
import "@openzeppelin/contracts/access/Ownable.sol";
import "@openzeppelin/contracts/token/ERC20/extensions/ERC20Burnable.sol";

contract TestToken is ERC20, Ownable, ERC20Burnable {
    constructor(string memory name, string memory symbol) ERC20(name, symbol) Ownable(msg.sender) {
        _mint(msg.sender, 100 * 10 ** decimals());
    }

    function mint(address to, uint256 amount) public onlyOwner {
        _mint(to, amount);
    }
}
The most important features are:
Ownable: this extension sets the deployer account as owner of the smart contract. It also introduces theonlyOwnermodifier that restricts the execution of certain functions to the owner of the contract.ERC20Burnable: this extension adds theburnandburnFromfunctions to the smart contract. These functions destroy tokens from a given account.constructor: called on deployment, the constructor will assign the given name and symbol to the token and mint 100 units of it to the account that deployed the contract.mint: this function creates new token units to a given account. It uses theonlyOwnermodifier so it can only be called from the owner account.
Deploy and interact with the contract
To compile and deploy the contract you can use either EVM or EraVM:
The Remix IDE is an open-source web and desktop application that supports Ethereum smart contract development and deployment, offering tools for writing, testing, debugging, and deploying smart contracts written in Solidity to EVM compatible protocols.
Clone the template project into Remix by clicking the "Clone" button on the "Home" tab under "Files". Then enter the repository URL below:
https://github.com/zkSync-Community-Hub/zksync-quickstart-remix.git
Then, open up the TestToken.sol contract file.
Connect your wallet
On the left side menu bar, select the "Deploy & Run Transactions" tab. Click on the "Environment" dropdown menu, select "Customize this list...". Then, click the toggle icon to enable an injected wallet provider.
Make sure your wallet is currently connected to the ZKsync Sepolia Testnet, as we will use our wallet’s configured network to deploy our smart contract.
Compile the contract
To compile the contract, click on the "Solidity Compiler" tab and press the "Compile TestToken.sol" button.
Deploy the contract
To deploy the contract, go back to the "Deploy and run transactions" tab. Enter the name and symbol for your token in the input field by the "Deploy" button, then click "Deploy". Sign the transaction in your wallet and wait a few seconds until it's processed.
Congratulations, your ERC20 token contract is now deployed on ZKsync Sepolia Testnet!
Under the "Deployed Contracts" section, you should now see your contract deployment. Click on the copy icon to copy your contract address. You will need this for the next section.
Interact with the ERC20 contract
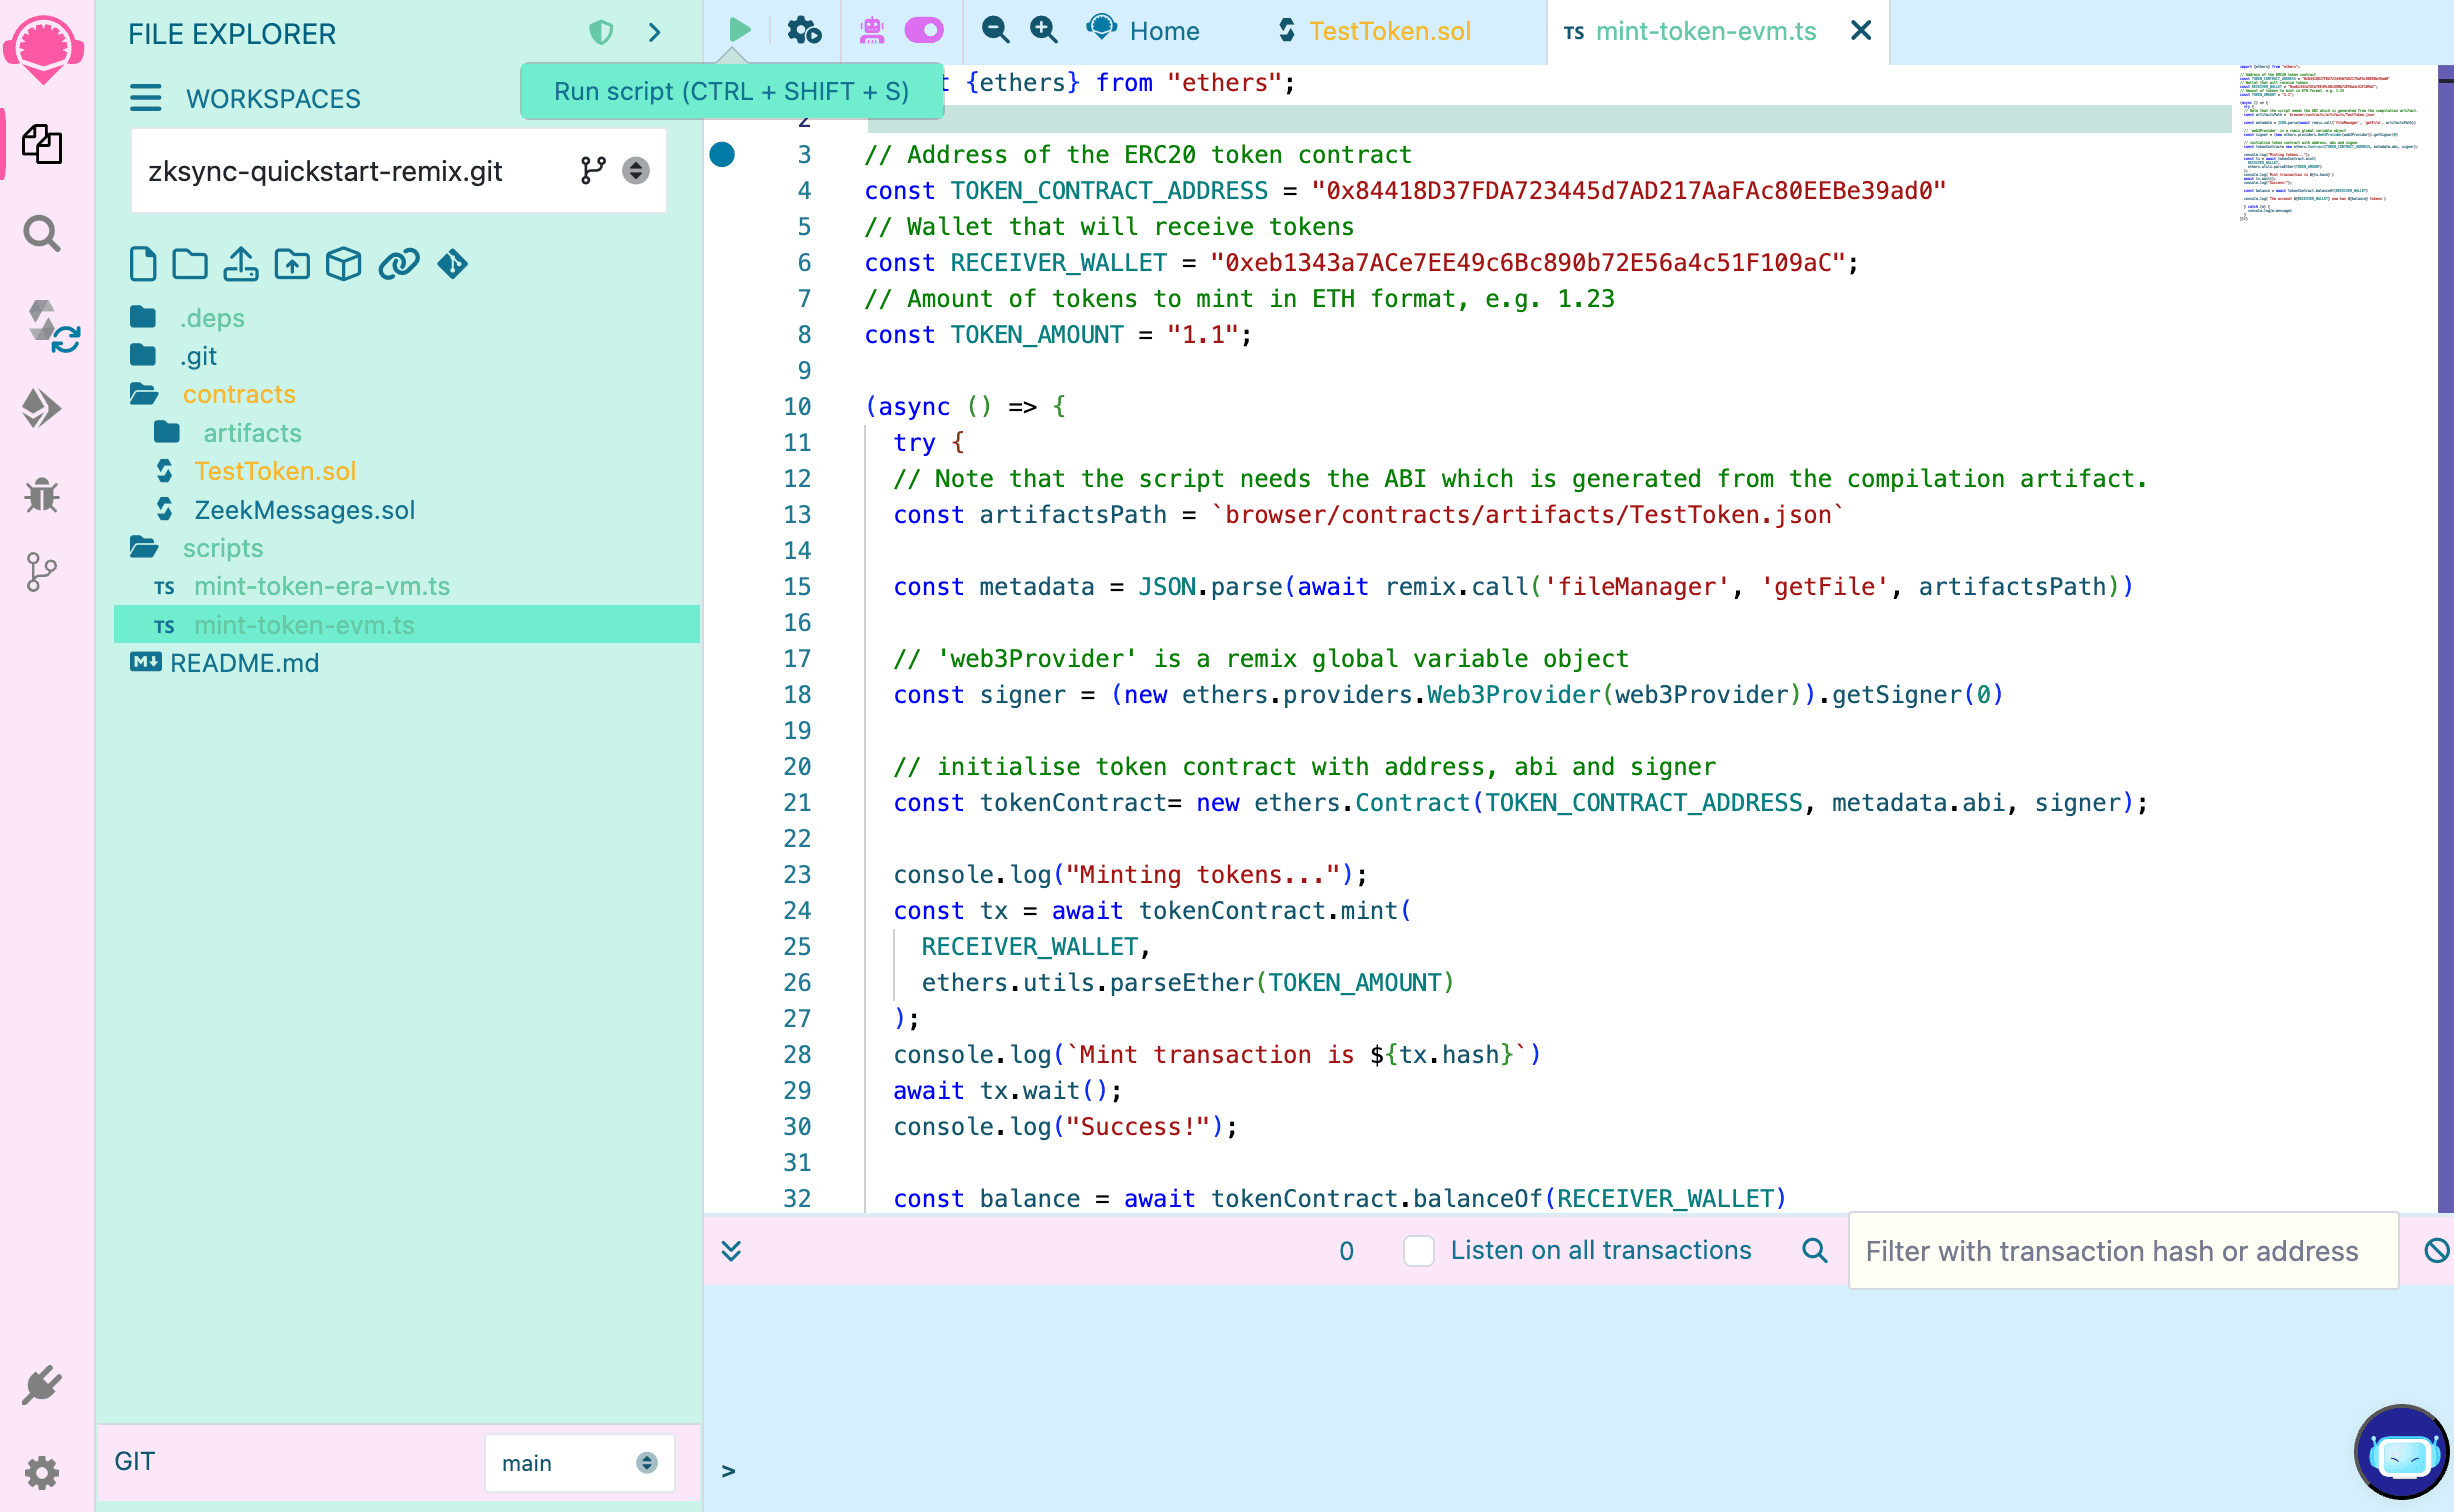
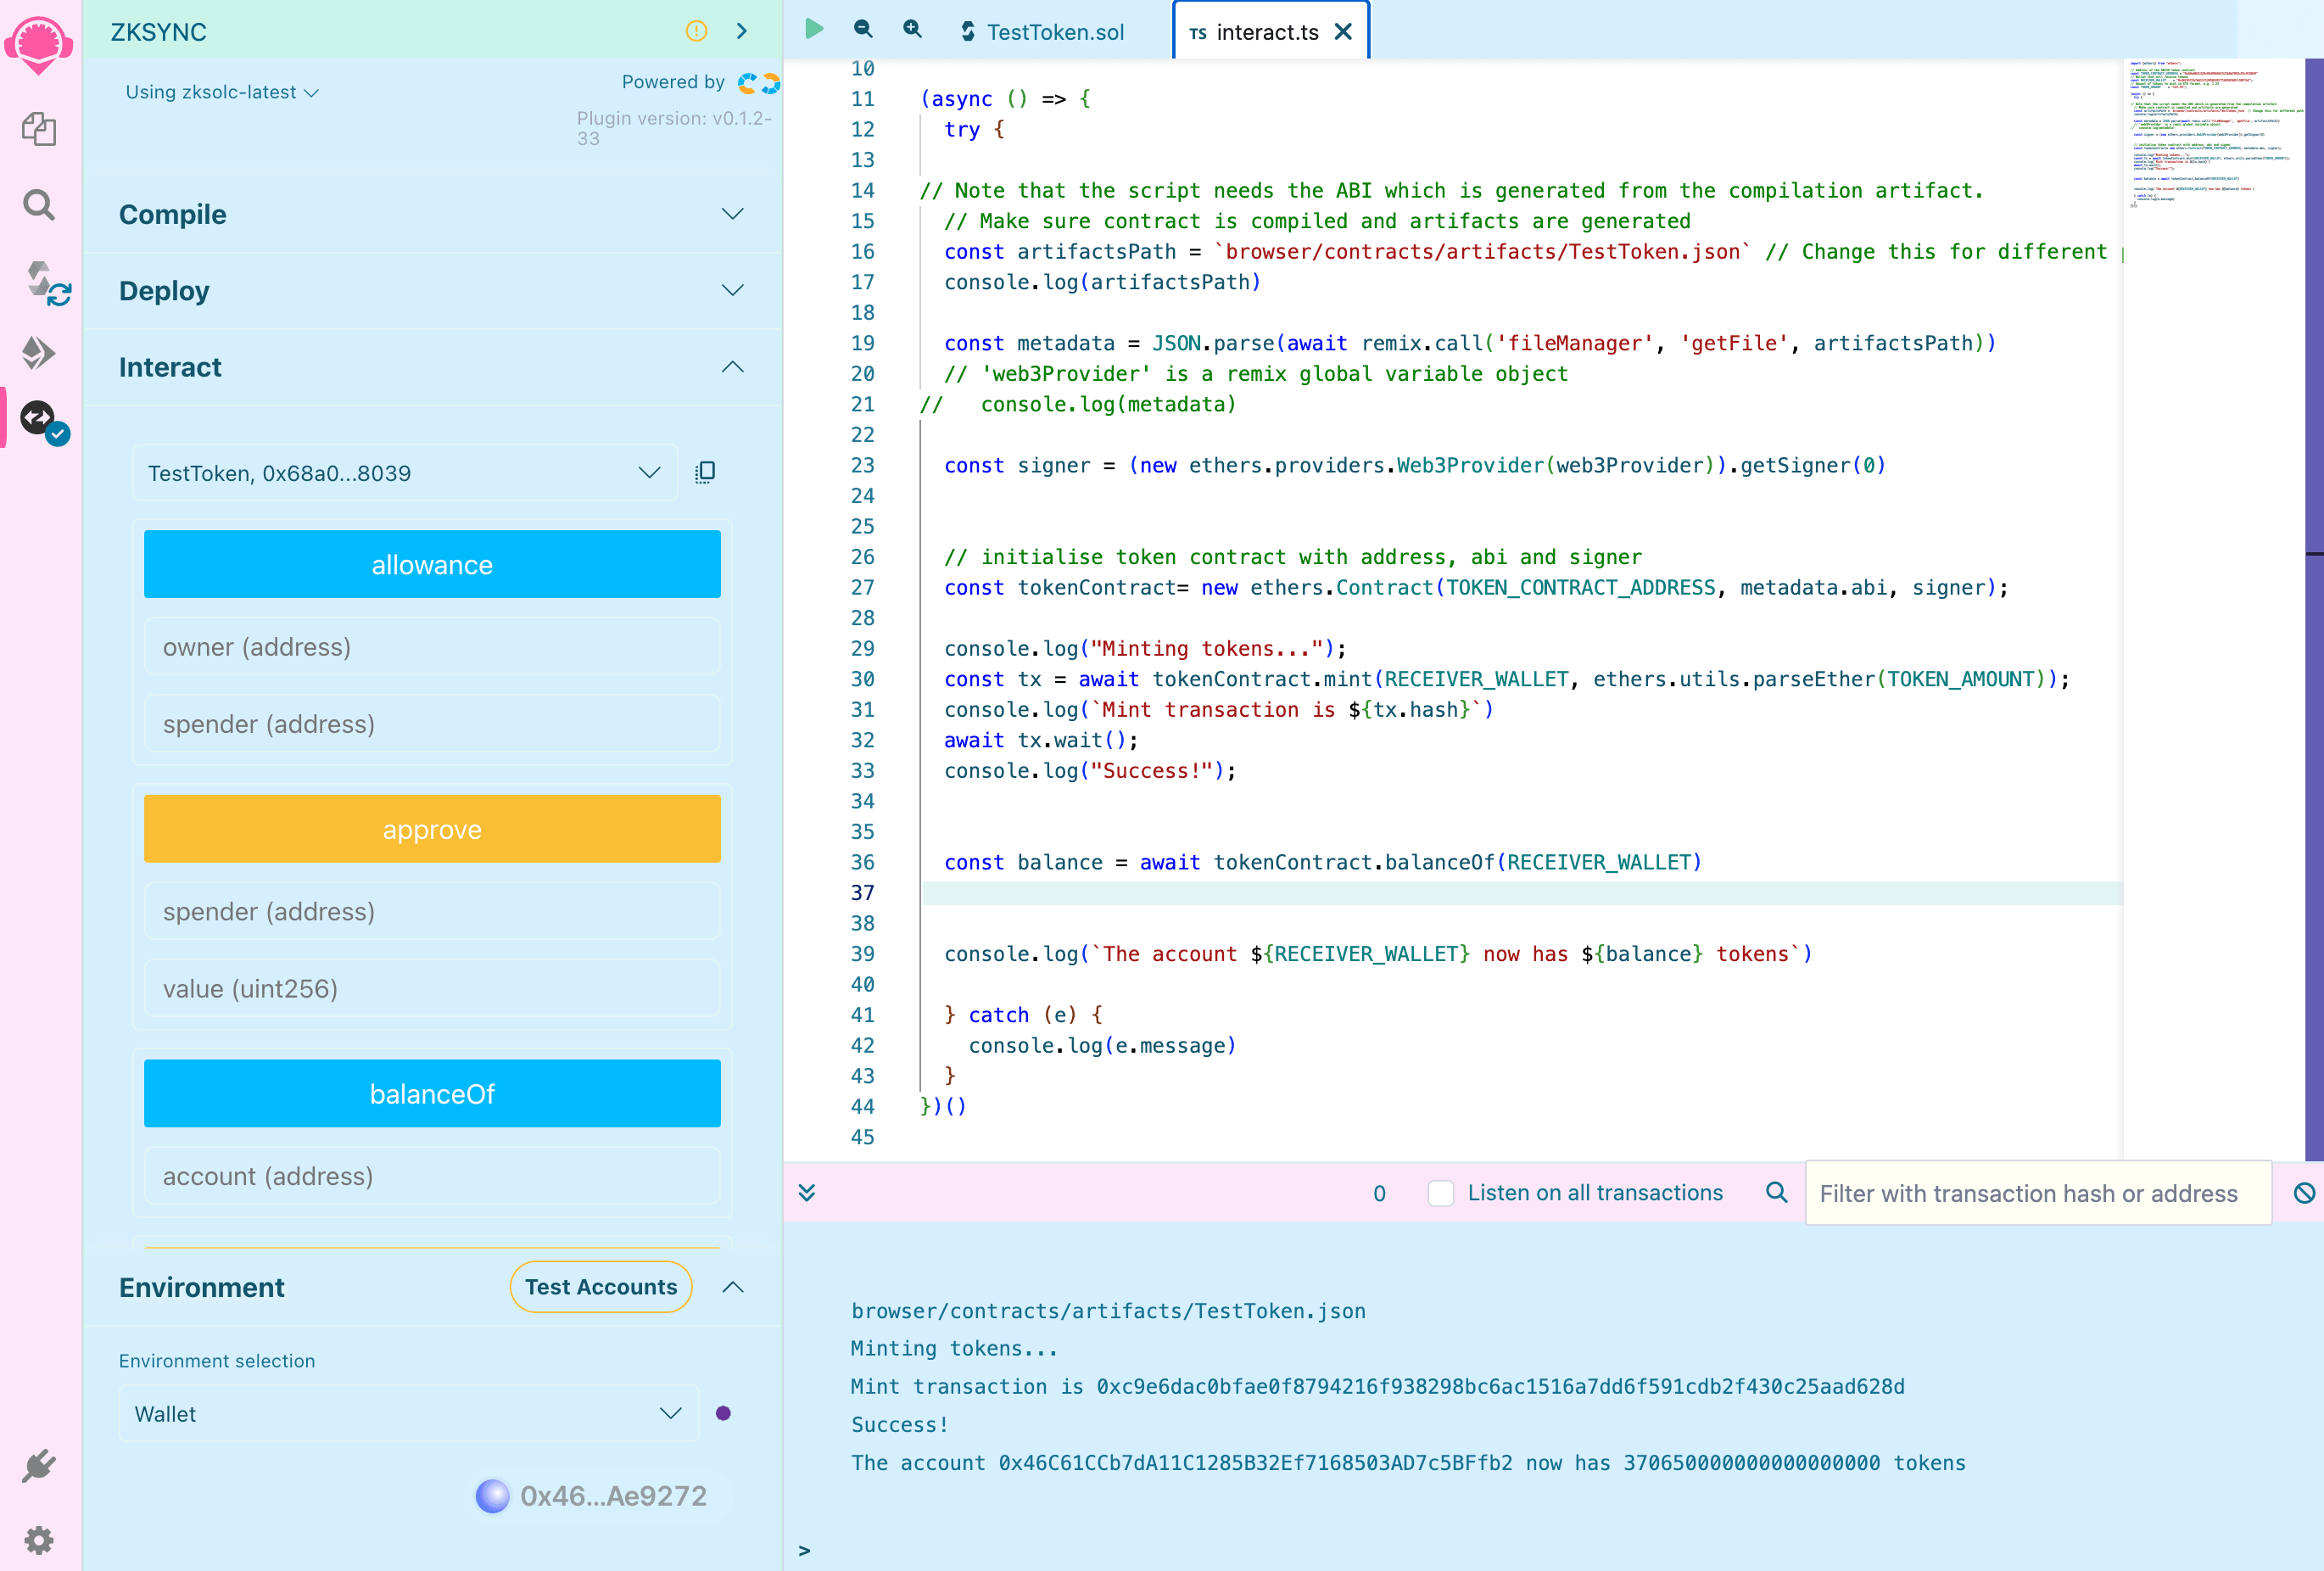
In the scripts folder you can find the mint-token-evm.ts script containing the following code:
import { ethers } from 'ethers';

// Address of the ERC20 token contract
const TOKEN_CONTRACT_ADDRESS = '';
// Wallet that will receive tokens
const RECEIVER_WALLET = '';
// Amount of tokens to mint in ETH format, e.g. 1.23
const TOKEN_AMOUNT = '';

(async () => {
  try {
  // Note that the script needs the ABI which is generated from the compilation artifact.
  const artifactsPath = `browser/contracts/artifacts/TestToken.json`;

  const metadata = JSON.parse(await remix.call('fileManager', 'getFile', artifactsPath));

  const signer = (new ethers.BrowserProvider(web3Provider)).getSigner(0);

    // initialise token contract with address, abi and signer
    const tokenContract = new ethers.Contract(TOKEN_CONTRACT_ADDRESS, metadata.abi, signer);

    console.log('Minting tokens...');
    const tx = await tokenContract.mint(RECEIVER_WALLET, ethers.parseEther(TOKEN_AMOUNT));
    console.log(`Mint transaction is ${tx.hash}`);
    await tx.wait();
    console.log('Success!');

    const balance = await tokenContract.balanceOf(RECEIVER_WALLET);

    console.log(`The account ${RECEIVER_WALLET} now has ${balance} tokens`);
  } catch (e: any) {
    console.log(e.message);
  }
})();
This scripts uses ethers to interact with the contract we’ve just deployed.
ethers , and viem can be used to interact with smart contracts deployed on ZKsync Era.Fill the following variables:
TOKEN_CONTRACT_ADDRESS: the contract address of the ERC20 token we just deployed.RECEIVER_WALLET: address of a different account that will receive new tokens.TOKEN_AMOUNT: the amount of tokens we’ll send to the account.
With the mint-token-evm.ts file open in the editor, click on the “▶️” button to run the script.
Sign the transaction in your wallet and see the output in the terminal.
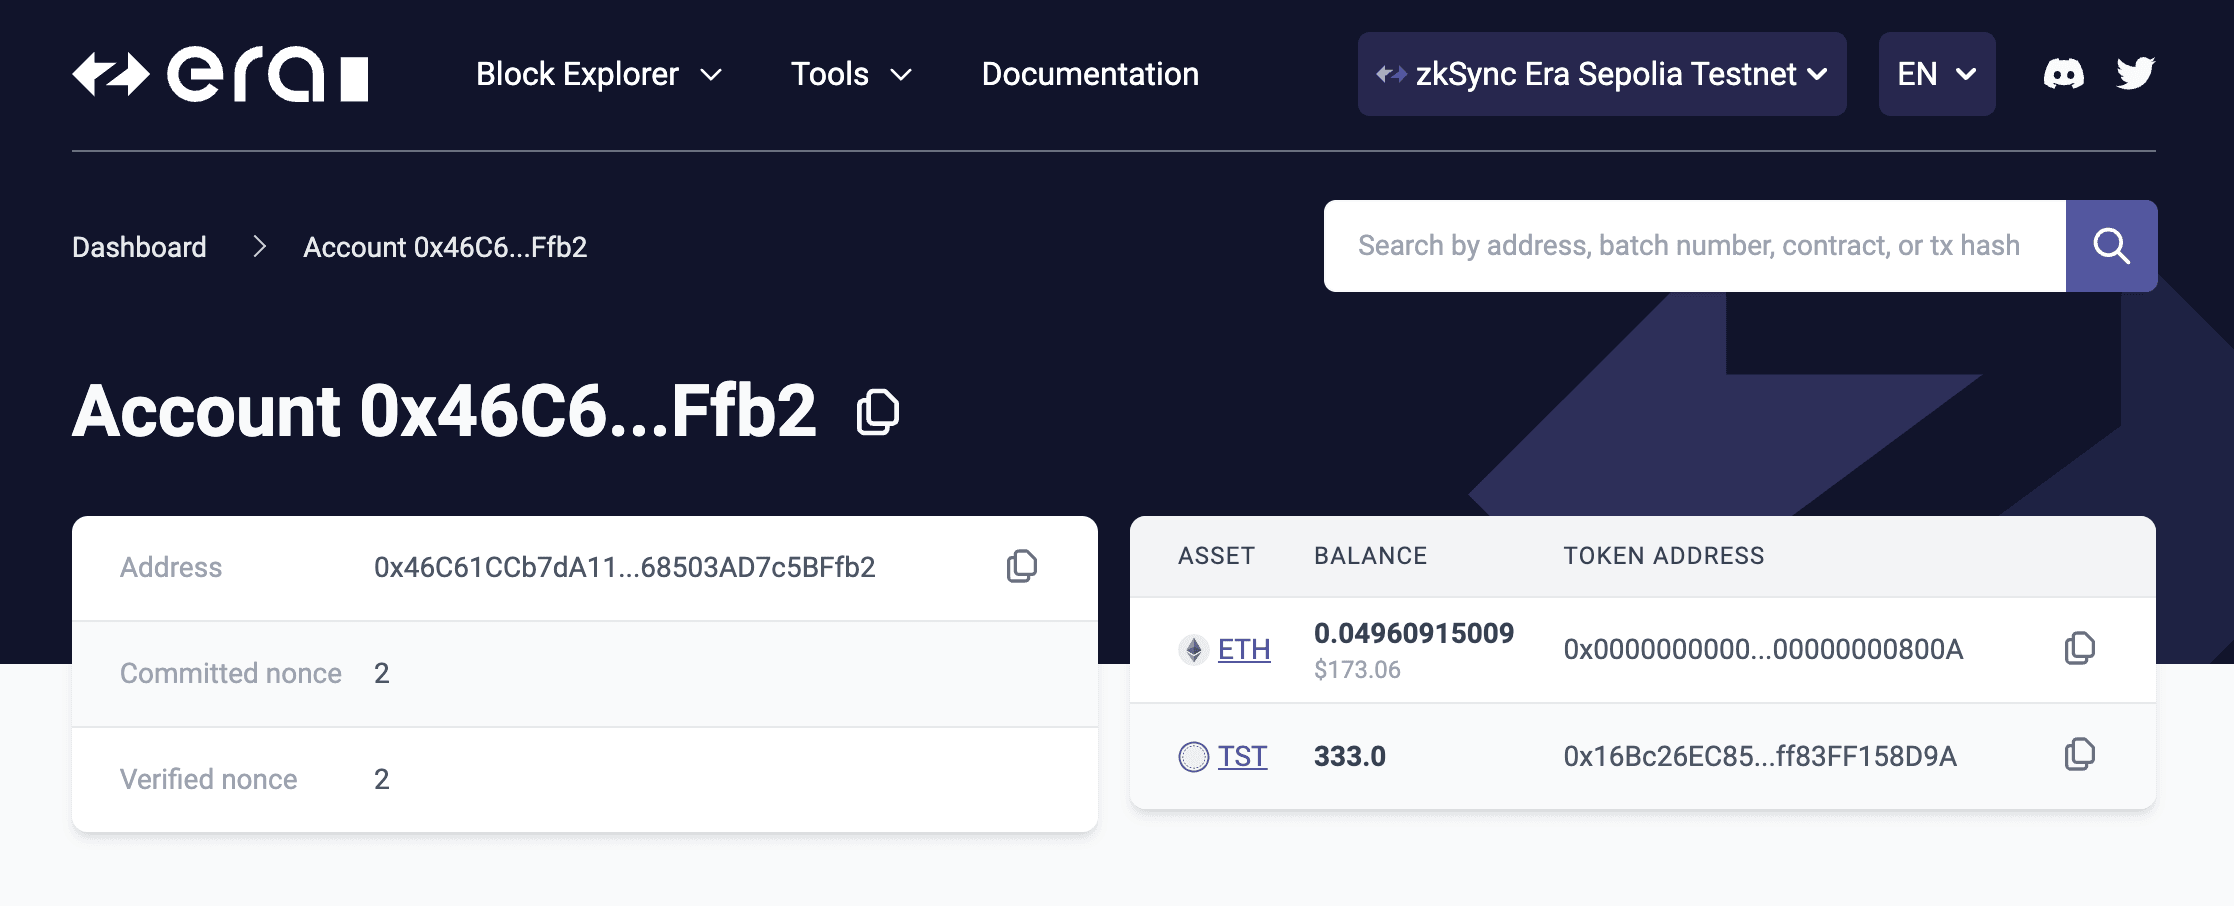
To confirm the account has received the tokens, visit the ZKsync Sepolia Testnet explorer and search the receiver wallet address. You’ll see the new token balance in the assets table:
Takeaways
- ZKsync Era is EVM compatible and supports existing smart contract libraries like OpenZeppelin
- Use popular libraries like
ethers,viem, orweb3.jsto interact with smart contracts deployed on ZKsync Era.
- The regulatory regime governing digital assets is still developing and is unclear in many jurisdictions.
- ERC20 tokens may possess unique legal, tax, and market risks, so it is up to you to determine which, if any, laws apply to your deployment of ERC20 tokens.
- The developers and publishers of this software disclaim any liability for any legal issues that may arise from its use.
Next steps
- Continue building with ZKsync in the ZKsync 101 section.
- Join the ZKsync developer community in Discord where you can ask any questions about this
tutorial in the
#dev-quickstartchannel. - Join our GitHub Discussions Community to help other devs building on ZKsync or share your project.